Ant Proof Sealant: Your Ultimate Guide to a Pest-Free Home
Discovering a line of ants marching through your kitchen is more than just an annoyance; it’s a sign of a hidden invasion. Many homeowners battle these persistent pests, trying everything from sprays to traps with little long-term success.
The real problem often lies in the tiny, unseen entry points ants use to access your home. This guide will explore the ultimate solution: ant proof sealant, a permanent barrier to keep these invaders out for good.
You'll Learn About
Why Ants Invade: Understanding the Enemy’s Tactics
Ants are masters of infiltration. They can exploit the smallest cracks and crevices in your home’s exterior, turning a microscopic gap into a superhighway for their colony.
Their primary motivations are simple: food, water, and shelter. A few crumbs on the floor or a leaky pipe can be an open invitation for thousands of ants to make your home their own.
Common Entry Points for Ants
To effectively block ants, you first need to think like one. Inspect your home for common vulnerabilities where sealants are most needed.
Look for gaps around windows and door frames, cracks in the foundation, and openings where utility lines, like pipes and wires, enter the house. These are the most frequent access points.
The Limits of Temporary Solutions
Sprays and baits can be effective for a visible ant problem, but they don’t address the root cause. These methods only eliminate the ants you see, not the entire colony or their points of entry.
For a lasting solution, you must physically block their paths. This is where the strategic application of a high-quality sealant becomes your most powerful weapon in the fight against ants.
Choosing Your Weapon: The Best Sealants to Ant-Proof Your Home
Not all sealants are created equal when it comes to pest control. The ideal product must be durable, flexible, and completely impenetrable to ants. Silicone and polyurethane-based caulks are often the top contenders.
These materials create a strong, waterproof, and flexible barrier that ants cannot chew through or bypass. Look for products specifically labeled for exterior use and pest sealing for the best results.
Silicone vs. Polyurethane Sealants
Silicone sealant is highly flexible and waterproof, making it perfect for areas prone to moisture, like kitchens and bathrooms. It adheres well to a variety of smooth surfaces, including glass, metal, and tile.
Polyurethane sealant is known for its incredible durability and paintable surface. It’s an excellent choice for sealing larger gaps in foundations and around the exterior of your home, as it can withstand more significant movement and abrasion.
Specialized Pest Control Sealants
Some products are specifically formulated with pest-repellent properties. While not a necessity, a sealant containing a bittering agent or a known repellent can add an extra layer of defense against ants and other crawling insects.
However, the most critical factor is the physical barrier itself. A well-applied, high-quality sealant, even without additives, will be more than sufficient to stop ants in their tracks. For more information on sealing your home, consider this comprehensive guide on ant-proof sealants.
The Ultimate Battle Plan: How to Apply Ant Proof Sealant
Applying sealant is a straightforward process, but preparation is key to creating an impenetrable barrier. Follow these steps for a professional and effective application.
Taking the time to do it right will save you from future headaches and ensure your home remains a no-go zone for ants.
Step 1: Identify and Inspect All Potential Entry Points
Your first task is a thorough inspection of your home’s exterior and interior. Arm yourself with a flashlight and meticulously check every potential entry point we discussed earlier.
Pay close attention to the foundation, window sills, door frames, and areas where pipes or wires enter your home. Mark each crack or gap you find with a piece of masking tape so you can easily locate them later.
Step 2: Clean and Prepare the Surface
For the sealant to adhere properly, the surface must be clean, dry, and free of old caulk, paint, or debris. Use a putty knife or caulk removal tool to scrape away any old material.
Once the old sealant is removed, clean the area with a wire brush and a household cleaner to remove any remaining dust or grime. Allow the area to dry completely before you begin sealing.
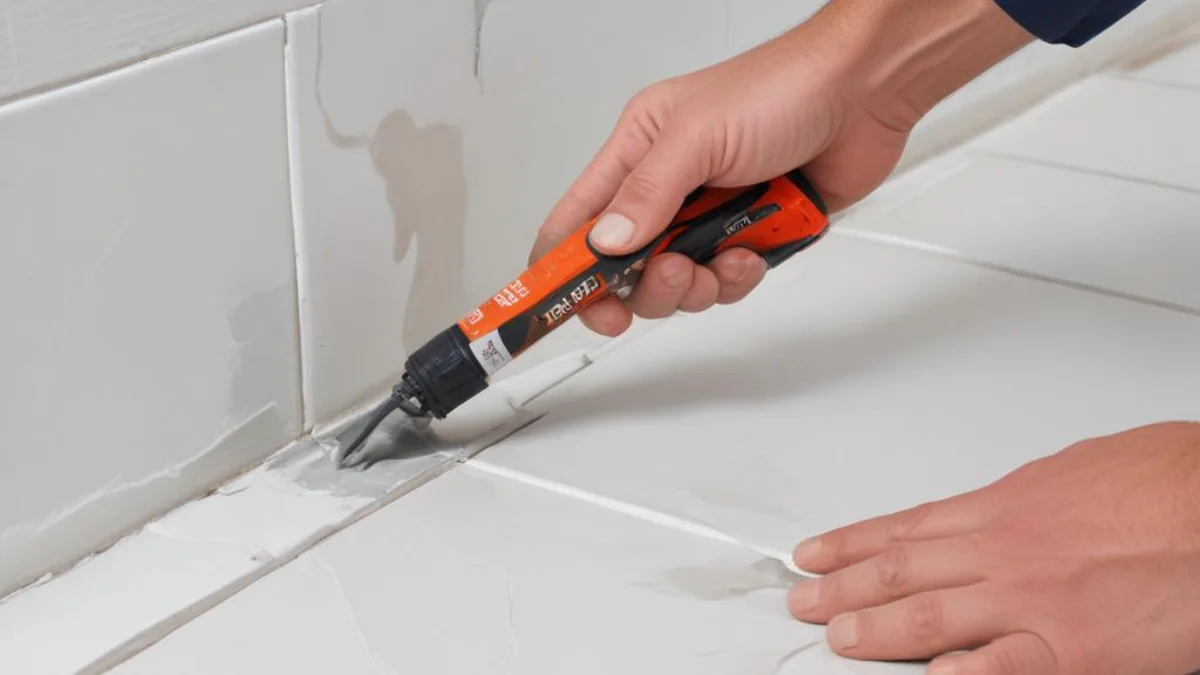
Step 3: Applying the Sealant
Cut the tip of the sealant tube at a 45-degree angle, making sure the opening is just large enough to fill the gap. Puncture the inner seal with a nail or the tool on the caulk gun.
Apply a steady, continuous bead of sealant directly into the crack. Move the caulk gun smoothly along the gap to ensure it is completely filled. The goal is to leave no air pockets or inconsistencies.
Step 4: Smoothing and Curing
Immediately after applying the bead, use a caulk finishing tool or a wet fingertip to smooth the sealant. This not only creates a clean, professional look but also ensures the sealant makes full contact with both sides of the gap.
Allow the sealant to cure completely according to the manufacturer’s instructions. Curing time can vary, but it’s crucial to avoid touching or exposing the sealant to moisture during this period.
Advanced Strategies: Beyond the Basics of Ant Proofing
While sealing cracks is the most critical step, a multi-faceted approach will provide the most robust defense against ants. Combine sealing with other preventative measures for a truly ant-proof home.
Integrating these strategies will create multiple layers of protection, making your home far less attractive and accessible to pests.
Environmental and Landscape Management
Ants often find their way to your foundation via overgrown vegetation. Trim tree branches and shrubs so they don’t touch the side of your house, creating a bridge for ants.
Maintain a clear, dry perimeter around your foundation. Ensure mulch, soil, and firewood are not piled directly against the house, as these can retain moisture and provide shelter for ants. Ensuring proper drainage is also key; you don’t want to find yourself asking why there is water under lifeproof flooring after ignoring exterior water issues.
Interior Prevention and Maintenance
The fight doesn’t stop at the exterior. Keep your kitchen and dining areas meticulously clean. Store food in airtight containers, wipe up spills immediately, and sweep or vacuum floors regularly.
Routinely check for and repair any plumbing leaks under sinks or in bathrooms. A small drip can provide the constant water source an entire ant colony needs to thrive. Proper waterproofing, similar to the principles behind a hot mop shower pan, is crucial throughout the home.
| Sealant Type | Best For | Flexibility | Paintable | Durability |
|---|---|---|---|---|
| Silicone | Kitchens, Bathrooms, Windows | High | No | Excellent |
| Polyurethane | Foundations, Siding, Driveways | Medium | Yes | Exceptional |
| Acrylic Latex | Interior Trim, Baseboards (Small Gaps) | Low | Yes | Good |
| Pest-Repellent Sealant | All potential pest entry points | Varies | Varies | Excellent |
Maintaining Your Ant-Proof Barrier for Long-Term Success
Your work isn’t done once the sealant has cured. A home is a dynamic structure that shifts and settles over time. Regular inspections are vital to ensure your ant-proof barrier remains intact.
At least twice a year, in the spring and fall, walk around your property and re-inspect the areas you sealed. Check for any new cracks or signs of sealant degradation.
When to Reapply Sealant
Look for sealant that is peeling, cracking, or pulling away from the surface. These are signs that the seal has been compromised and needs to be replaced.
Don’t just apply new sealant over the old. It’s crucial to completely remove the damaged section and re-apply a fresh bead to ensure a perfect, long-lasting seal.
The Long-Term Value of Vigilance
By making sealing and inspections a regular part of your home maintenance routine, you are taking the most effective, permanent step toward an ant-free life. A proactive approach is always better than a reactive one.
Sealing entry points is not just about stopping ants; it also improves your home’s energy efficiency by eliminating drafts and prevents water damage by sealing moisture pathways. It’s a small investment of time that pays significant dividends in comfort and peace of mind.