Double Cattle Panel Greenhouse: The Ultimate DIY Guide for a Super-Sturdy, Year-Round Garden Structure
Every dedicated gardener dreams of extending the growing season, harvesting fresh produce year-round, and protecting delicate plants from harsh weather. The problem is that traditional greenhouses often come with a prohibitive price tag or complex construction plans. Many common DIY solutions, while affordable, frequently lack the necessary space and structural integrity to withstand significant wind and snow.
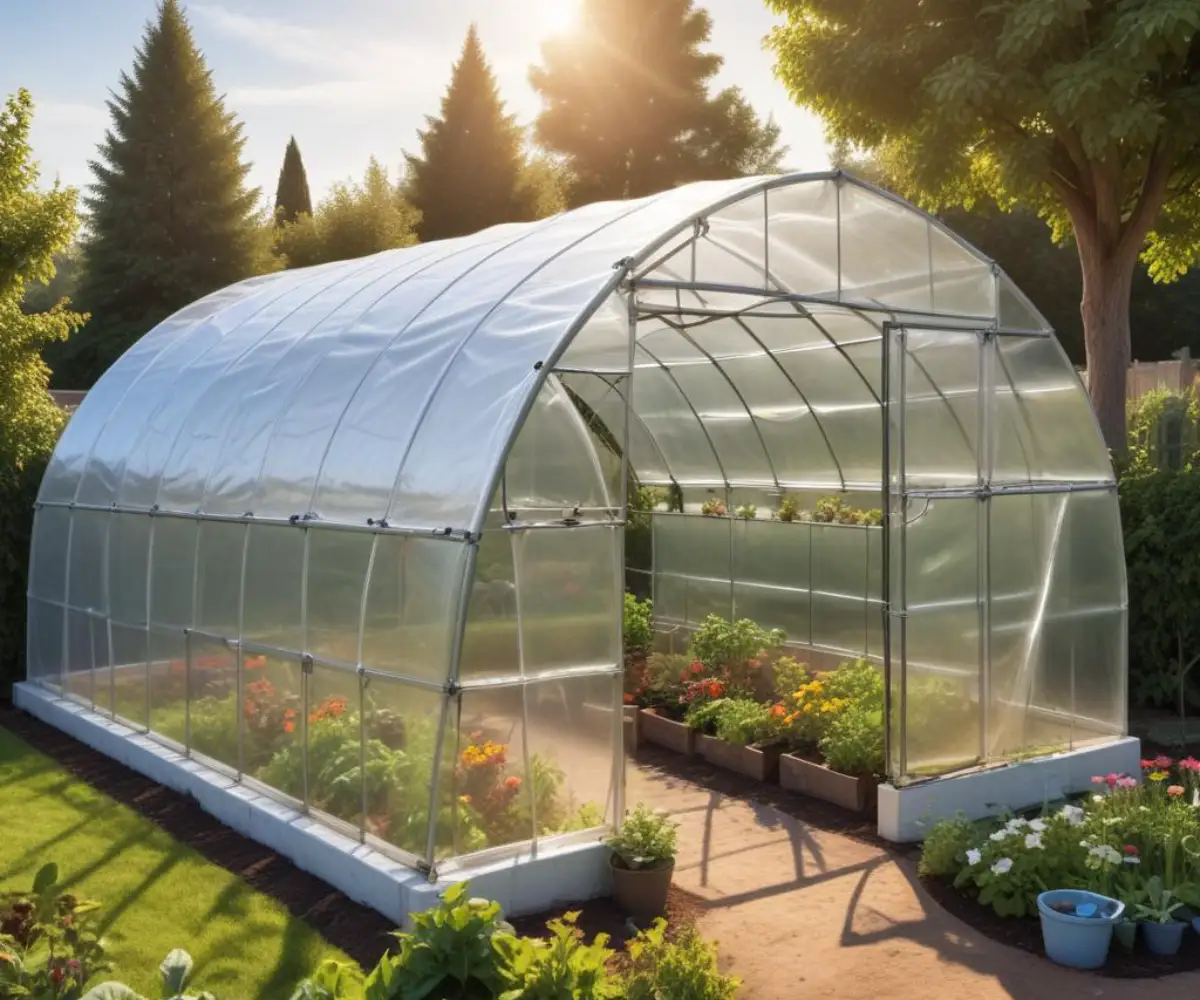
This challenge leads many to seek a better way—a solution that balances cost, durability, and size. The double cattle panel greenhouse emerges as the superior answer to this problem. By combining the affordability and simplicity of cattle panels with a wider, more robust design, you can create a spacious and resilient structure capable of supporting a thriving garden through all four seasons.
You'll Learn About
Why a Double Cattle Panel Design Outshines the Rest
While single cattle panel greenhouses are popular, expanding to a double-panel width unlocks a new level of functionality and strength. This design isn’t just about adding a few extra feet; it’s about fundamentally upgrading your growing capabilities and ensuring your investment lasts for years to come.
More Space, More Possibilities
The most immediate advantage of a double-wide design is the significant increase in usable space. This expanded footprint allows for multiple growing beds, dedicated walkways, and ample room for potting benches and tool storage. The higher peak also provides more vertical space, making it ideal for trellising tall plants like tomatoes, cucumbers, and pole beans.
Unmatched Strength and Durability
A wider stance and the geometry of joining two panels create an incredibly strong arch. When properly constructed with a central ridge beam and anchored to a solid foundation, a double cattle panel greenhouse can effectively shed snow and withstand high winds. This inherent structural integrity provides peace of mind that a single-panel design often cannot.
The Surprising Cost-Effectiveness
Despite its larger size and superior strength, the double cattle panel greenhouse remains one of the most cost-effective options available. The primary materials—cattle panels, lumber, and greenhouse plastic—are relatively inexpensive. When you compare the cost per square foot to pre-fabricated kits or traditional greenhouses, this DIY project delivers exceptional value.
Planning Your Double-Wide Greenhouse: The Blueprint for Success
Thorough planning is the most critical phase of this project. Taking the time to properly select your site, gather materials, and finalize your design will save you significant time and prevent costly mistakes during construction. A well-thought-out plan is the foundation of a successful build.
Site Selection and Preparation
Choose a location that receives at least 6-8 hours of direct sunlight per day, ideally with the longest side of the greenhouse facing south. The ground must be level and have good drainage to prevent water from pooling inside. Clear the area of all vegetation, rocks, and debris before you begin building the foundation.
Essential Materials & Tools Checklist
Having all your materials and tools on hand before you start will streamline the construction process. The following table outlines the key components needed for a sturdy and long-lasting double cattle panel greenhouse. Prices are estimates and can vary based on location and supplier.
| Item | Specification | Purpose/Tips | Estimated Cost |
|---|---|---|---|
| Cattle Panels | 16 ft x 50 in, 4-gauge galvanized steel | Forms the main arches of the structure. Use galvanized panels to prevent rust. | $25 – $35 per panel |
| Lumber for Base | Pressure-treated 2×6″ or 2×8″ boards | Creates a durable, rot-resistant foundation frame. | $15 – $25 per 12 ft board |
| Lumber for End Walls | Standard 2×4″ boards | Used for framing the front and back walls, door, and vents. | $5 – $8 per 8 ft board |
| Greenhouse Plastic | 6 mil, UV-stabilized polyethylene film | Crucial for longevity. Do not use standard hardware store plastic sheeting. | $150 – $300 per roll |
| Fasteners | Deck screws, U-staples, bolts/nuts | Use exterior-grade screws to prevent rust. U-staples secure panels to the wood base. | $50 – $75 total |
| Anchoring Material | 3-4 ft rebar stakes or ground anchors | Secures the foundation to the ground to prevent lifting in high winds. | $5 – $10 per stake |
| Ridge Beam | 2×6″ or 4×4″ board | A central support beam at the peak is highly recommended for a double-wide design. | $20 – $40 |
| Ventilation | Automatic vent opener, window, or roll-up sides | Essential for temperature regulation. An automatic opener is a valuable addition. | $40 – $150+ |
Critical Measurements and Layout
A standard 16-foot cattle panel can be bent to create an arch that is roughly 8-10 feet wide. By joining two panels with a slight overlap, you can achieve a width of 14-16 feet with a comfortable peak height of 8-10 feet. Carefully lay out the dimensions of your foundation frame, ensuring it is perfectly square by measuring the diagonals—the measurements should be identical.
Step-by-Step Construction Guide: From Ground to Garden
With your plan in place and materials gathered, it’s time to build. This process should be approached methodically, focusing on creating a square, level, and securely joined structure. Always prioritize safety, as bending the panels creates significant tension.
Step 1: Building a Rock-Solid Foundation
Construct a rectangular base frame using your pressure-treated lumber. Lay the boards on your leveled site and screw them together at the corners. Drive rebar stakes into the ground every 4-6 feet on both the inside and outside of the frame, ensuring at least half the stake is buried for maximum stability.
Step 2: The Art of Joining the Panels
The connection at the peak is the most critical structural point of a double cattle panel greenhouse. There are several effective methods for this. One of the strongest is the central ridge beam method: overlap the two panels by 1-2 feet at the peak and secure them to a 2×6″ or 4×4″ wooden beam running the length of the greenhouse. Use U-bolts or heavy-duty straps to clamp the panels tightly to the beam.
Step 3: Raising and Securing the Arches
This step requires at least two people. With one person on each side, carefully bend the joined panels into an arch and lift them into place, setting the ends onto the foundation frame. The tension will hold them against the wood. Secure the bottom of each panel to the frame using U-staples every 8-12 inches.
Step 4: Framing the End Walls
Construct the front and back walls using 2×4″ lumber. Frame out a doorway on one end and a window or vent opening on the other. Attach the end wall frames directly to the foundation and to the first and last cattle panel arches for a fully integrated and sturdy structure.
Step 5: Installing the Greenhouse Plastic
Choose a calm, warm day to install the plastic, as this will allow you to pull it tighter. Drape the plastic over the entire structure, ensuring you have at least 2-3 feet of excess on all sides. For a professional and secure fit, use a wiggle wire and lock channel system along the foundation and end walls. This method allows you to easily retighten the plastic if it stretches over time.
Optimizing Your Greenhouse for Year-Round Growth
A completed structure is just the beginning. To create a truly productive environment, you must manage temperature, airflow, and interior space effectively. These optimizations will transform your greenhouse from a simple shelter into a high-performance growing machine.
Ventilation: The Secret to a Healthy Greenhouse
Heat buildup is a major risk, even on cool, sunny days. Proper ventilation is non-negotiable. The best approach combines low and high vents to create natural convection. Roll-up sides are an excellent option for maximum airflow, while a vent near the peak, ideally with an automatic opener, will release trapped hot air. The goal is to create cross-breeze and allow rising heat to escape.
Insulation and Winterizing Strategies
To grow through the winter in colder climates, you’ll need to add insulation. One of the most effective methods is to use a second layer of greenhouse plastic on the interior, creating a dead air space that acts as an excellent insulator. You can also insulate the foundation by burying rigid foam board around the exterior perimeter to reduce heat loss through the ground.
Interior Layout: Maximizing Your Growing Space
The wide interior of a double panel greenhouse offers great flexibility. Design your layout with raised beds along the sides and a central walkway. When considering the best use of your space, think about durability and comfort; it’s similar to how one might read King Hickory sofa reviews to find long-lasting furniture that fits a living area perfectly. Well-planned beds and paths ensure you can work efficiently without wasting any valuable square footage.
Common Mistakes to Avoid (And How to Fix Them)
Even with careful planning, issues can arise. Knowing the most common pitfalls ahead of time can help you avoid them entirely or correct them quickly before they become major problems. Paying attention to these details ensures the long-term success of your greenhouse.
Poor Anchoring
The most dangerous mistake is underestimating the power of wind. A greenhouse acts like a large kite, and inadequate anchoring can lead to it lifting or shifting. Solution: Use rebar stakes that are at least 3-4 feet long and drive them deep into the ground. In very high-wind areas, consider using ground anchors or pouring small concrete footers for the foundation to attach to.
Incorrect Plastic Installation
Loose, sagging plastic is inefficient and prone to damage. It can collect water, stretch unevenly, and tear in the wind. Solution: Always install the plastic on a warm, calm day. Use a wiggle wire system instead of staples for a secure, tight fit that can be adjusted later. Ensure the plastic is pulled taut in all directions before locking it in place.
Inadequate Ventilation
A greenhouse without enough ventilation will quickly overheat, killing your plants. A single door is not enough. Solution: Plan for ventilation from the start. Install a large vent on the back wall, opposite the door, to create a cross-breeze. Roll-up sides or a roof vent are even better for managing summer heat effectively.
Frequently Asked Questions
Here are answers to some of the most common questions gardeners have when considering a double cattle panel greenhouse project.
What is the total cost of a double cattle panel greenhouse?
The cost can range from $500 to $1,500, depending on the size, materials chosen, and local prices. Using salvaged materials can significantly reduce costs, while adding features like automatic vents will increase them.
How long does the greenhouse plastic last?
High-quality, UV-stabilized greenhouse plastic should last for 4-6 years before needing replacement. Avoid cheap, non-stabilized plastic, which may only last a single season.
Can this structure handle heavy snow?
Yes, one of the primary advantages of the arched, double-panel design is its ability to shed snow. The steeper slope compared to a single-panel design prevents heavy accumulation. For regions with extreme snowfall, adding a central ridge beam and internal cross-bracing is highly recommended for extra support.
What are the best cattle panels to use?
Look for 4-gauge galvanized steel panels. The galvanization is essential to prevent rust, and the heavy 4-gauge wire provides the necessary rigidity and strength for a durable structure.
Conclusion: Your Year-Round Harvest Awaits
Building a double cattle panel greenhouse is an empowering project that puts a highly productive, four-season garden within reach. By focusing on a strong foundation, secure panel connections, and proper ventilation, you can construct a durable and spacious greenhouse that will serve you for years to come. This design offers an unbeatable combination of strength, space, and affordability, making it the ideal solution for any serious gardener looking to take their passion to the next level.