240v 20 Amp Circuits: The Ultimate Guide to Power and Safety
You have a powerful tool, a new appliance, or perhaps an electric vehicle charger. You look at the plug, and it’s not the familiar household type. This is the moment many homeowners and DIY enthusiasts face a common but critical problem: understanding and safely implementing a 240v 20 amp circuit.
Ignoring the specific electrical requirements of high-power equipment is not just an inconvenience; it’s a significant safety hazard. Mismatching voltage and amperage can lead to damaged appliances, tripped breakers, and even electrical fires. This guide provides the authoritative information you need to navigate the world of 240-volt, 20-amp power safely and effectively.
You'll Learn About
What Exactly Is a 240v 20 Amp Circuit?
In a standard North American home, most outlets provide 120 volts. A 240v circuit, however, delivers twice the voltage. It achieves this by using two 120-volt “hot” wires from opposite phases in your electrical panel, along with a ground wire.
The “20 amp” rating refers to the amperage, or the amount of electrical current the circuit can safely handle. A double-pole 20-amp circuit breaker is the essential safety device that protects this circuit. It’s designed to trip and cut off power if the current exceeds 20 amps, preventing the wires from overheating.
Common Uses for a 240v 20 Amp Circuit
While less common than standard 120v outlets, 240v 20 amp circuits are essential for a variety of powerful equipment. You’ll find them used for high-demand appliances and tools that require more power than a standard outlet can provide.
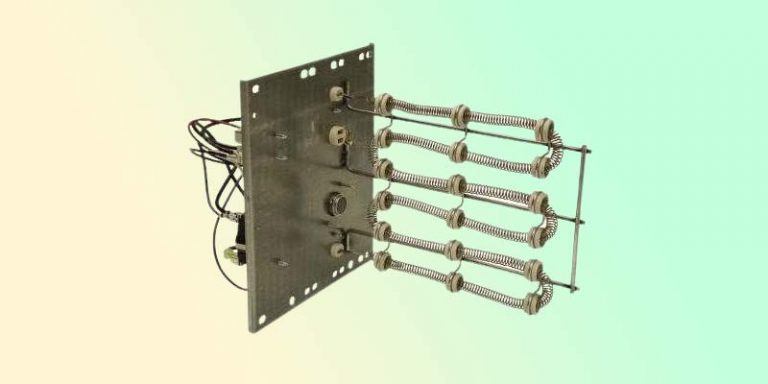
Typical applications include heavy-duty workshop tools like table saws, air compressors, and some welders. They are also used for powerful window or through-wall air conditioners and certain tankless water heaters. Increasingly, they serve as a practical option for Level 2 electric vehicle (EV) charging, offering a significant speed boost over a standard 120v outlet.
The Core Problem: Wire Size and Component Mismatches
The most frequent and dangerous issue arises from using the wrong components for the circuit. The wire gauge, outlet type, and circuit breaker must all be correctly rated for 240 volts and 20 amps. Using undersized wire is a major fire hazard, and using the wrong outlet can lead to equipment damage.
Electrical codes, specifically the National Electrical Code (NEC), provide strict guidelines to ensure safety. A fundamental rule is that for a 20-amp circuit, you must use a wire of the proper gauge. Attempting to save money with a thinner wire can have catastrophic consequences.
Solution: Selecting the Correct Wire Gauge
For any 240v 20 amp circuit, the minimum requirement is 12-gauge copper wire. The American Wire Gauge (AWG) system is standard, and for wire, a lower number means a thicker wire. Therefore, 12-gauge wire is thicker and more robust than the 14-gauge wire used for standard 15-amp circuits.
You will typically use a 12/2 NM-B cable (often with a yellow outer jacket). This cable contains two insulated 12-gauge conductors (one black, one white) and a bare copper ground wire. For a 240v circuit, both insulated wires will be used as “hot” conductors. It is a critical safety practice to re-identify the white wire as a hot wire by wrapping it with black or red electrical tape at both ends.
The Right Breaker and Outlet for the Job
Once you have the correct wiring, the next step is ensuring you have the right protective device and connection point. These components are not interchangeable and must match the circuit’s specifications.
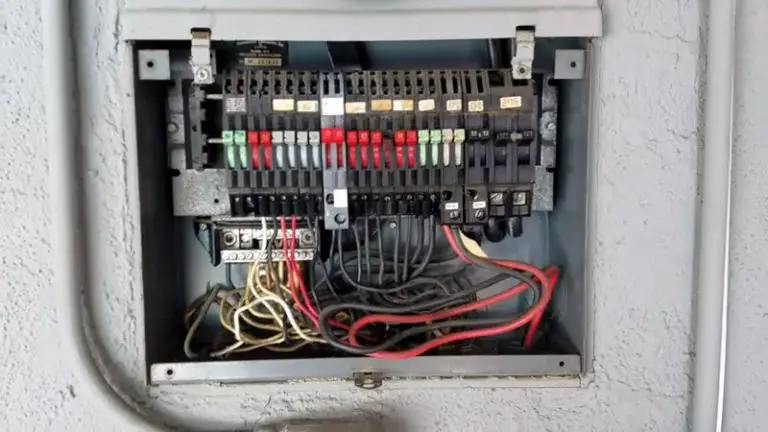
The circuit must be protected by a 2-pole 20-amp circuit breaker in your main electrical panel. A 2-pole (or double-pole) breaker is physically wider than a standard breaker and connects to both 120v bus bars in the panel to provide 240 volts. This ensures that if a fault occurs, both hot legs of the circuit are disconnected simultaneously.
Choosing the Correct NEMA Receptacle
You cannot plug a 240v appliance into a standard 120v outlet. The plug and outlet configurations are intentionally different to prevent dangerous mistakes. These configurations are standardized by the National Electrical Manufacturers Association (NEMA).
For a 20-amp, 240-volt circuit, the most common outlet is the NEMA 6-20R. This receptacle has a distinctive slot pattern with one vertical blade, one horizontal blade, and a semi-circular ground pin. This unique design ensures only compatible NEMA 6-20P plugs can be inserted. Trying to upgrade your charging setup? An EV charger upgrade might be simpler than you think. Converting from 110V to 220V for your EV charger can dramatically reduce charging times.
| Component | Specification | Primary Function & Safety Note |
|---|---|---|
| Circuit Breaker | 2-Pole, 20 Amp | Protects the circuit from overcurrent. Must be a double-pole breaker to disconnect both hot wires. |
| Wire | 12-Gauge Copper (Minimum) | Safely carries the electrical load. Never use 14-gauge wire on a 20-amp circuit. |
| Cable Type | 12/2 NM-B or 12/3 NM-B | 12/2 is for 240v-only loads. 12/3 is needed if a 120v component and a neutral are required. |
| Receptacle (Outlet) | NEMA 6-20R | Provides the correct physical connection for 20A/240V plugs, preventing misuse. |
| Continuous Load | 16 Amps (Maximum) | Circuits should only be loaded to 80% of their capacity for continuous use (more than 3 hours). |
240v 20 Amp for Level 2 EV Charging: A Smart Choice?
Many electric vehicle owners look for faster home charging solutions. While a powerful 50-amp circuit is a popular choice, a 240v 20 amp circuit is often a more practical and affordable option. It provides a charging rate that is more than sufficient for overnight charging for most daily commutes.
A 20-amp circuit can deliver up to 3.8 kW of power (16 amps continuous load x 240 volts). This translates to roughly 10-15 miles of range added per hour of charging, a significant improvement over the 3-5 miles per hour from a standard 120v outlet. For many EV drivers, this is the sweet spot between performance and installation cost, as it uses less expensive 12-gauge wire.
Step-by-Step Installation Guide (For Qualified Individuals)
Installing a new electrical circuit is a task that should only be undertaken by those with a strong understanding of electrical systems and local codes. If you are not 100% confident, always hire a licensed electrician. The following steps are for informational purposes.
1. Planning and Preparation
First, turn off the main breaker to the entire electrical panel. Plan the route for your new cable from the panel to the outlet location. Ensure you have all the necessary materials: the correct breaker, cable, outlet, and electrical box.
Consider the total load on your panel. High-draw appliances can put a strain on your system. It’s important to know if your current service can handle the extra load, especially if you have other powerful appliances. For example, understanding if 200 amp service is enough for a tankless water heater is a similar and crucial calculation.
2. Running the Cable
Carefully run the 12/2 NM-B cable from the panel to the desired outlet location. Secure the cable to joists and studs according to code, typically with staples every 4.5 feet and within 8 inches of any box. Leave at least 6-8 inches of extra wire at both ends.
3. Wiring the Outlet
At the outlet box, strip the outer sheathing from the cable. Connect the bare copper wire to the green ground screw on the NEMA 6-20R receptacle. Connect the black and white (which you’ve marked with black tape) wires to the two brass-colored “hot” terminals. The order does not matter for a 240v-only circuit.
4. Wiring the Breaker
Inside the electrical panel, connect the bare copper ground wire to the ground bus bar. Connect the black and re-identified white wires to the two terminal screws on the 2-pole 20-amp breaker. Snap the breaker firmly into two open slots in the panel, ensuring it connects to both bus bars.
5. Final Steps and Testing
Replace the electrical panel cover. Turn the main breaker back on, followed by the new 20-amp breaker. Use a multimeter to test the new outlet. You should read approximately 240 volts between the two hot slots and 120 volts from each hot slot to the ground.
Troubleshooting Common 240v Circuit Problems
Even with careful installation, issues can arise. If your new circuit isn’t working, the problem is often simple. A common mistake is installing the 2-pole breaker incorrectly in the panel so that both poles connect to the same 120v leg, resulting in 0 volts between them.
Always double-check your connections. Ensure all terminal screws are tight and that the breaker is fully seated. A voltage tester is an indispensable tool for diagnostics. If you’re encountering something unusual, like different standards for wiring, our guide on the European light switch can shed light on how electrical systems can vary.
When to Call a Professional Electrician
Understanding the principles of a 240v 20 amp circuit is empowering. However, the actual installation involves significant risks. Your safety and the safety of your home should always be the top priority.
You should always hire an electrician if you are unfamiliar with working inside an electrical panel, if your panel is old or full, or if you have any doubts about your ability to complete the job safely and to code. A professional can ensure the job is done right, providing peace of mind and protecting your investment.