2 White Wires, 1 Black Wire Outlet: The Shocking Truth & Fix
You opened up an electrical outlet, ready for a simple replacement, and stopped dead in your tracks. Inside the box, you see a confusing jumble: two white wires and one black wire. This isn’t what the diagrams usually show, and it immediately raises questions about safety and proper installation.
This wiring scenario is more common than you might think, but handling it incorrectly can lead to serious electrical hazards. This guide will demystify the “2 white, 1 black” outlet configuration, explain exactly what it means, and provide step-by-step instructions on how to wire it safely and reliably.
You'll Learn About
What Does 2 White Wires and 1 Black Wire Mean?
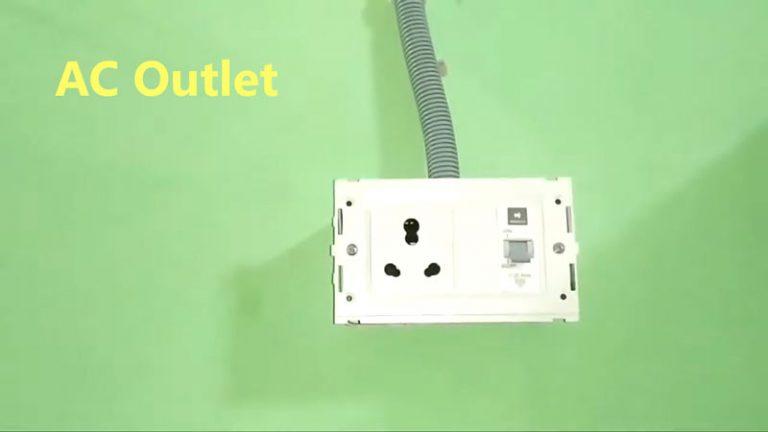
Encountering two white (neutral) wires and one black (hot) wire almost always signifies that you are looking at a “middle-of-the-run” outlet. In an electrical circuit, power flows from the breaker panel, through a series of outlets or devices, and then back to the panel.
An outlet at the very end of this chain is called an “end-of-run” and typically has just one of each wire. An outlet in the middle, however, serves as a junction point. One set of wires brings power *into* the box, and a second set sends power *downstream* to the next outlet in the series. The single black wire is often the result of pigtailing at a previous junction, a practice we will cover in detail.
Understanding the Role of Each Wire
Before touching any wires, it’s crucial to understand their function. In a standard 120-volt circuit in North America, the color coding is consistent and vital for safety.
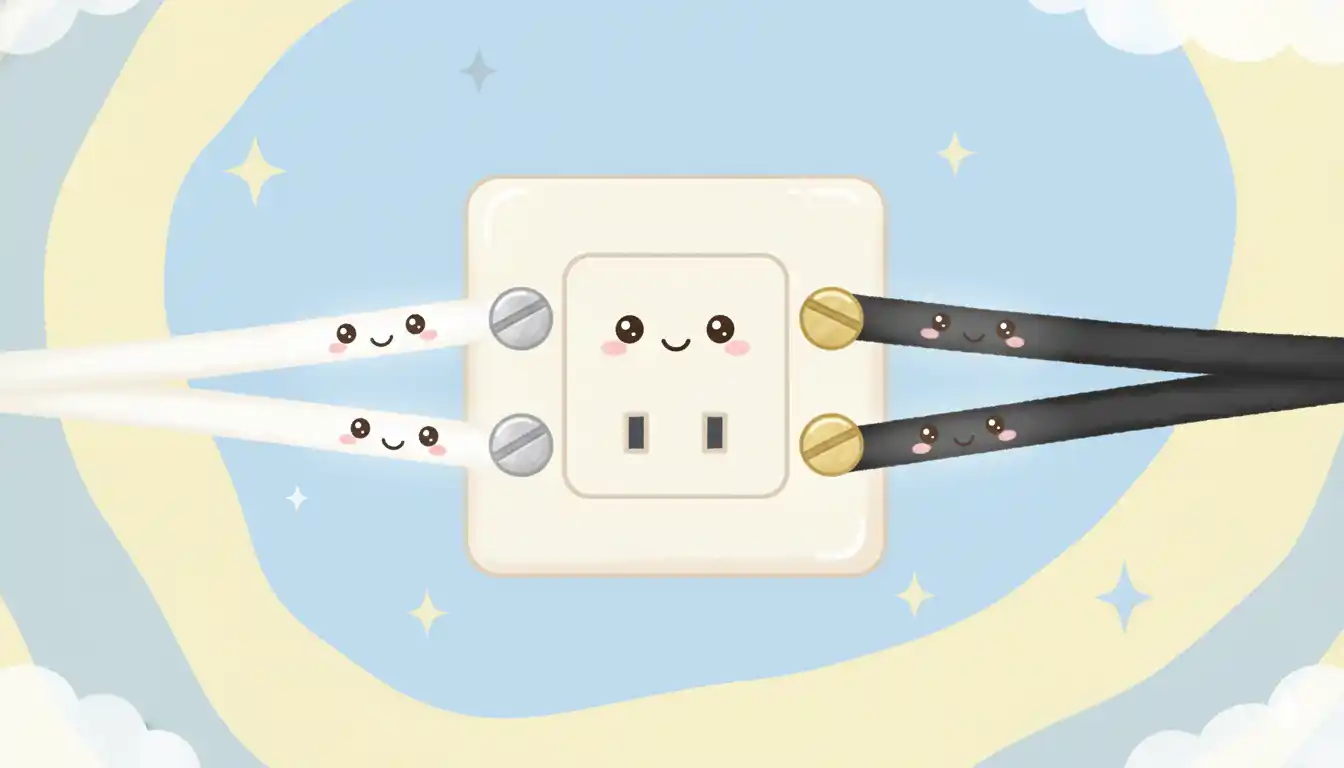
The black wire is the “hot” wire. It carries the electrical current from the breaker panel to the outlet. The white wires are the “neutral” wires; they complete the circuit by carrying the current back to the panel. The bare copper or green wire is the ground wire, a critical safety feature that protects against electrical shock in case of a fault.
The Professional Method: Pigtailing Your Outlet
While you can connect the wires directly to the outlet’s terminals, the safest and most reliable method is called pigtailing. Pigtailing isolates the outlet from the main circuit, meaning a failure of the receptacle won’t cut power to everything else downstream. It is the method preferred by professional electricians for its long-term stability.
A pigtail is simply a short piece of wire (about 6 inches) that connects the main circuit wires to the device. You will create a small bundle for the neutral wires and connect it to the outlet with a single pigtail, ensuring a secure and independent connection.
Step-by-Step Guide to Pigtailing
First and foremost: Turn off the power to the circuit at your breaker panel. Confirm the power is off using a reliable voltage tester before proceeding. This is the most important step for your safety.
1. Prepare Your Pigtails: Cut a 6-inch length of white electrical wire (THHN, typically 14-gauge for a 15-amp circuit). You will also need the appropriate size wire nut to connect three wires of that gauge.
2. Connect the Neutral Wires: Take the two white neutral wires from the wall and the end of your new white pigtail wire. Hold the ends together so they are even, and securely twist a wire nut over them in a clockwise direction. Tug on each wire to ensure the connection is solid.
3. Connect to the Outlet: Now you have a single white pigtail wire. Loosen the silver-colored neutral terminal screw on the new outlet. Curl the end of the pigtail into a “C” shape and hook it around the screw in the direction the screw tightens (clockwise). Tighten the screw firmly.
4. Connect the Hot and Ground Wires: Connect the single black wire to the brass-colored (hot) terminal screw on the outlet. Connect the bare copper ground wire to the green ground screw. With these connections made, your outlet is now safely wired.
5. Install the Outlet: Gently fold the wires back into the electrical box. If you find the box is old or damaged during this process, you may need to learn how to remove an old metal outlet box before proceeding. Screw the outlet into the box and attach the faceplate.
Alternative Method: Using the Outlet Terminal Screws
Standard outlets come with two sets of screws on both the hot and neutral sides, allowing you to attach the incoming and outgoing wires directly. This is known as “feed-through” wiring or “daisy-chaining.” While functional, it is generally considered less reliable than pigtailing.
In this method, you would connect each of the two white wires to one of the two silver neutral screws. The single black wire connects to one of the brass hot screws. The key issue here is that the entire circuit’s continuity now depends on the small metal tab connecting those two screws. If the outlet fails, the rest of the circuit goes dead.
Pigtail vs. Feed-Through: Which is Better?
Making the right choice ensures the long-term health of your electrical system. While both methods are code-compliant in most areas, their impact on reliability is significant. A small investment in time to create pigtails can prevent future troubleshooting headaches.
| Feature | Feed-Through Method (Using Terminals) | Pigtail Method |
|---|---|---|
| Reliability | Lower. The outlet is an active link in the circuit. | Higher. The outlet is isolated from the downstream circuit. |
| Ease of Installation | Slightly faster and requires fewer materials. | Takes a few extra minutes and requires wire nuts. |
| Impact of Failure | If the outlet fails, all downstream outlets lose power. | Only the single pigtailed outlet will fail; the circuit remains intact. |
| Box Space | Requires less space inside the electrical box. | Requires more space for wire nuts and bundled wires. |
| Best For | Quick replacements where reliability is less of a concern. | All installations, especially for critical circuits. |
Critical Safety Warnings and Common Mistakes
Working with electricity requires your full attention. Many homeowners make simple mistakes that can have dangerous consequences. Avoid these common pitfalls to ensure a safe and successful installation.
Always use a voltage tester to confirm the power is off before you touch any wires. Never rely on a light switch or the position of the breaker alone. Test the black wire against both the white and ground wires to be certain.
Mistake #1: Using Back-Stab Connections
Many modern outlets have small holes on the back for “back-stabbing” wires, where you simply push the straight wire in to make a connection. Avoid these at all costs. These connections are notorious for loosening over time, creating a serious fire hazard from arcing.
Always use the screw terminals on the side of the outlet. They provide a much more secure and reliable mechanical connection that is less likely to fail. This is one of the most important principles for durable electrical work.
Mistake #2: Connecting Wires to the Wrong Terminals
Connecting a hot wire to a neutral terminal can create a direct short, causing sparks, a tripped breaker, and potential damage to any device you plug in. The rule is simple and universal: black wires go to brass screws, white wires go to silver screws.
This is especially critical when dealing with more complex wiring, such as for high-power appliances. Understanding the risks associated with different setups, like determining if a 3-prong dryer outlet is safe, underscores the importance of proper connections.
Mistake #3: A Crowded Outlet Box
Forcing too many wires into an electrical box can damage the wire insulation and create unsafe pressure on the connections. If pigtailing makes the box too full, you should consider installing a deeper box.
Sometimes the issue isn’t just crowding but also convenience. If large plugs and adapters are constantly blocking your second receptacle, you might consider a simple fix. Learning how to rotate an outlet 90 degrees can solve this problem without complex rewiring.
Frequently Asked Questions (FAQ)
This wiring setup often leads to more questions. Here are answers to some of the most common ones to help you navigate your project with confidence.
What if I have 2 black wires and 2 white wires?
This is the classic middle-of-run scenario. One black/white pair is the “line” (power in), and the other is the “load” (power out). In this case, you would pigtail the two black wires together with a third black pigtail for the outlet, and do the same for the white wires.
Can this wiring be used for a GFCI outlet?
Yes, but you must be careful. A GFCI outlet has “LINE” and “LOAD” terminals. The “line” is the power coming in from the breaker. To protect only the GFCI outlet itself, you would pigtail the hot and neutral wires as described and connect the pigtails to the “LINE” terminals, leaving the “LOAD” terminals empty.
If you want to protect all downstream outlets, you would connect the incoming power to the “LINE” terminals and the outgoing wires to the “LOAD” terminals. Mis-wiring a GFCI will result in it not functioning correctly.
What if a white wire seems hot when tested?
Stop immediately and call a licensed electrician. A white wire carrying a current indicates a serious wiring problem elsewhere in your home, such as a dangerous open neutral or a mis-wired switch loop. This is not a situation for a DIY repair and requires professional diagnosis.